Family backpacking or bushwalking - planning your trip

Planning on a hiking trip with your children?
Looking for information on how to bushwalk or backpack with your family?
What is the best way to go multiday hiking with your kids?

Damian and Renee have a fantastic blog called Adventure in progress which focuses on "Encouraging families to get outdoors and experience adventure".


Frank got lost in reading some of the terrific posts and enjoying Renee's wonderful photography.

This family , with three young children, just completed their first family backpacking (we call it bushwalking in Australia) trip to Gentian Pond on the Appalachian Trail. Damian just posted a great yarn titled: Gentian Pond Backpacking - Successes and Failures

It is highly recommended reading as Damian has analysed the different gear that worked (was a Success) and did not work (Failed) when hiking with children. Great reading and very informative.

(btw -Gentian Pond Campsite is on the Mahoosuc Trail section of the Appalachian Trail in New Hampshire, located 5 miles or so from the Maine border)

Related Posts
Hiking Gear - the basics
The Spirituality of Bushwalking - one man's reflections
Australian Alps Walking Track - when your kids go it alone!
Tasmania Hiking - we drag out the young people!
What basic gear do you need to get started multiday hiking?

Continue Reading ....

Microspikes - a solution for hiking in icy conditions?

Having trouble hiking or bushwalking on icy tracks?
Want to stop falling over on your next winter trek?
Are conditions too good (or not good enough) for snowshoes but icy and slippery?

What is the best footwear for hiking in the snow or ice?

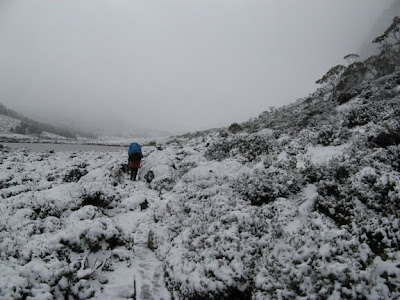
Hiking in Tasmania in winter can be a treacherous experience. The snow is not consistent and there are many sections of track that remain icy all day or , just to add to the fun, the duck boarding is covered with compressed, slippery snow and ice. When we were there a couple of years ago, walking was slow and dangerous as we constantly tested our footing to avoid slipping and a serious fall.


We needed a solution for our Overland Track hike in mid September (early Spring)

Snow shoes were impractical to wear all the time because of the inconsistancy in snow cover. In addition, the narrowness of the track or it's condition meant it was dangerous to wear snowshoes as they can easily be caught in roots or rocks.


In an attempt to solve this problem we recently purchased some Kahtoola Microspikes. This weekend we tested them around Falls Creek in Victoria on a family skiing trip and were very happy with our purchase.


What are they?
"Lightweight" (300 - 400gms depending on size) boot / shoe "chains" WITH spikes

Background:
The microspikes were recommended by Alan, a mate from the east coast of the USA, who walked the Overland Track with us a couple of years ago. (we have never seen them for sale in Oz)
We researched them and according to the "blurb" the Microspikes are OK for rock, concrete, scree, ice, snow. Perfect for the type of conditions we would be facing.

Four pairs were ordered from Kahtoola - the prices (in Australian dollars) worked out to $90 each including freight.

Incredibly, they were ordered on a Monday night and were delivered Friday of the same week!

Test
We went to Falls Creek in Victoria last weekend on a family ski trip. The conditions were snowy, icy and very slippery on the roads etc around the village.

Threw on our Microspikes and they were great:
1) Really easy to put on (almost one handed)
2) Did not feel too weird to wear on solid surfaces like road and gravel - (Thought it would be like being perched up in the air on unstable chains)
3) Worked a treat on icy surfaces. Just like walking normally
4) Worked really well on compressed / icy snow (like you get on duck boarding) Including one section that was almost a 40 degree angle.
5) Did not move around or slip off the boot - just held in position

Possible risks/ problems / issues
- This was an hour long test in "civilised" conditions - no pack or tree roots or bog holes - therefore untested in rough conditions (not that the OT is very rough)
- not sure of durability of (to quote) "tough elastomer shoe harness" if hooked in branches , roots etc. It does fit very snugly to your boot / shoe so that is a bonus.
- NOT designed to replace snow shoes in deep snow - we bought them to improve traction where snow shoes are a pain i.e. wearing big and clumpy duck like feet trying to walk up an icy rock face or down a very slippery section of duck boarding

Conclusion
- Look the goods for us even if they assist with increasing our speed on icy sections by 20%
- adding another 400g is acceptable if we can save a few falls and bruises
- will probably still take snow shoes (we have Yowies and have used them in the area before) on the chance there is a good dump of snow and we can do some off track walking
- We will do a follow up post on how they perform in real conditions

Related Topics:
Living on the Edge – or was it cold? Pictures of Walls of Jerusalem to Overland Track via the Never Never
Launceston to Dixon Kingdom Hut – Walls of Jerusalem – Winter
Walls of Jerusalem – Mt Jerusalem – Winter
Dixon Kingdom Hut to Meston Hut – Winter
Meston Hut to Kia Ora Hut – via the Never Never – Winter
Kia Ora Hut to Pelion Hut – Winter
Pelion Hut to Windemere Hut – Winter
Windemere Hut to Cradle Mountain Lodge - Winter

Continue Reading ....

Hiking the South Coast Track in Tasmania - Surprise Bay to Cockle Creek

In this post, Larry Hamilton continues his extensive trip report on the South Coast Track in Southern Tasmania.

This post commences on Day Eight where Larry had overnighted at Surprise Bay, (one of our favourite places on the SCT) and continues to the end of the Track at Cockle Creek.

Day Eight 26 June

The rain continued heavily overnight and was steadily falling in the morning so I took an enforced rest day. Because of the previous rest days I got a little stir crazy and would have liked to keep moving but it wouldn't have been pleasant walking. I had a brief respite from the rain in the afternoon and ventured out with my camera. The creek I crossed yesterday which was over waist deep was impressively high and I got a photo of it which unfortunately didn't do it justice. Had I been crossing it today it would have been an exciting swim.

Surprise Bay from the campsite

Day Nine 27 June

It stopped raining about 1am and apart from the occasional sprinkle was pretty dry. The wind had also dropped off so the condensation issues in the tent were pretty severe. It is a short hop to Granite Beach with the South Cape Range thereafter so in clearing weather and showers I walked over the range and down to Granite Beach. Granite Beach turned out to be the highlight of my trip probably because I arrived with rainbows and three quite big waterfalls pouring into a very pretty bay. I also liked the climb up beside the waterfall and the interesting location of the campsite. The rain showers gradually decreased and stopped late in the afternoon enabling me to dry some of my gear out and really appreciate just what a pretty spot it is. I'd go back there in a flash.

Tent and tarp setup at Granite Beach campsite


Granite Beach from the western campsite

Day Ten 28 June

I started early and was walking in pretty dim light at 7.30am as I anticipated a long day over South Cape Range. The weather had cleared and I had a bright, sunny and cool day. As predicted it was a muddy day and I sloshed over the range getting dirtier and dirtier. Initially the descent is tough with long drops and lots of exposed and slippery tree roots. Because of the rain, the track was in many places the river course and I got pretty wet. The later descent from the range when I broke out of the forest is a really nice walk and because I had made good time over the range I ended up whistling happily along a nice track through light coastal forest down towards South Cape Rivulet. I'd had a good day which I didn't really expect, given the tales I'd heard about South Cape Range.

Looking back at the ocean from the South Cape Range

I ended the day by swimming South Cape Rivulet which was still big from the rain on the previous days. The camp on the west side of the rivulet is a nice spot in a unique environment. I set up camp and got into dry gear. Towards the evening clouds gathered in the west and it looked as if rain was on the way again as I prepared my evening meal.

South Cape Rivulet

Day Eleven 29 June

I had some rain showers overnight but the day dawned clear with light and fluffy clouds which cleared during the day. It wasn't too pleasant putting on completely saturated clothes when it was only six degrees in the morning but it didn't take long to warm up. The walk to Cockle Creek is a pleasant one and has some great views, some beautiful beaches and some interesting landforms at Coal Bluff.
The author - Larry Knight

It is a really enjoyable way to end the walk and I felt a bit ambivalent at the finish. I still had food and fuel in my pack but had to stop. I was pleased to be at the end but also disappointed that there was not more to go.

The beach - Cockle Creek

I arrived at Cockle Creek at midday and after phoning Dover for the pickup taxi had plenty of time to change into clean clothes, phone my wife and poke around Cockle Creek taking photos.
Bridge over Cockle Creek

I was lucky with the weather and had taken it easy. The walk was everything I'd expected and certainly as good as it is reported to be. I'd happily do the walk again but am setting my sights on seeing some of South West Cape and of the side bays, now that I've seen the main track. I enjoyed having the South West Track to myself and didn't see a soul for the eleven days. That for me adds to the sense of wilderness. I'd certainly recommend the walk as one to do. The track is well marked and navigation isn't an issue. The muddiest plains have boardwalks and there is sufficient challenge in the walk to make it exciting and interesting. But it is the environment and the scenery that really make it worth doing.


Related Posts

The South Coast Track - Solo Winter Trip report by Larry Hamilton - Part One
South Coast Track - Part Two by Larry Hamilton - Ironbound Ranges and Leeches
Larry's Port Davey Trip Report- great reading
Gear List for Wilderness Bushwalking Trip - Larry Hamilton's excellent gear list
Stuck between Louisa and Faraway Creeks - Our adventure on the South Coast Track
Hiking the South Coast Track - our first (and last time)

Continue Reading ....

South Coast Track - Ironbound Ranges and Leeches

In this post we continue with Larry Hamilton's guest post on hiking the South Coast Track in Southern Tasmania.

The South Coast Track runs between Melaluka and Cockle Creek in the South West Heritage area in Tasmania. It combines spectacular coastal hiking with some (a lot) of slog through inland sections with mud and more mud....

Part Two commences from the Louisa Creek campsite before he heads up the Ironbound Range, a climb notorious for difficult weather conditions and a very steep exposed climb.

Day Four 22 June

I was up by 5.30 am packing up in the dark and on the track before dawn at 7.45am. It was a beautiful, clear, still morning and the weather report for the area was for heavy fog. That wasn't evident in the Louisa River valley but as I ascended the Ironbounds the fog rolled in over the ranges and through the valleys from the west. I was above the fog by the time it arrived and so got a very pretty view of the mountains poking out of the fog for most of the day. And I walked in clear weather for the whole of the day. I got to the top of the Ironbounds at 11.30am and was pleased to have had a cool day for the climb. Tackling the climb on a hot summer's day wouldn't be my idea of fun.

Views from the Ironbound Range- great weather


I hit the Ironbounds high camp at midday, had lunch and a look around the campsite. The descent was trickier than the ascent as everyone finds and I reached the low camp at 2.30pm and thought carefully about continuing as dusk was not that far away. I decided to push on and almost immediately came across a number of big trees down across the track and my pet hate (yellow, slimy mud! I much prefer the peaty black mud) this combination slowed me down considerably, probably contributed to by some weariness from the climb and descent.

I got into camp as dusk was descending at 4.15pm in pretty dim light and was pleased to have done so. Little Deadmans Bay is a pretty spot and I thought I'd take another rest day to have a good look at it and its surroundings on the morrow.

(Ed: Check out this post Hiking the South Coast Track Solo by a very fit woman)

Day Five 23 June

Having resolved to take a rest day I woke up feeling fresh and eager to continue and as a result thought again about continuing. The forecast was for deteriorating weather and drizzle in the evening so I fought the tendency to keep moving and instead I took advantage of the sunshine and pretty location to dry things out, relax and take some photos.

Deadmans Bay

Day Six 24 June

The drizzle didn't eventuate yesterday or last night and while the weather was evidently coming, it was not a frontal gale coming from the west but more heavy overcast and increasing drizzle. It is an easy walk from Little Deadmans Bay to the New River Lagoon and the rain started while walking on the beach approaching the lagoon. I had an interesting half hour trying to put on a tarp/poncho I had brought with me and would have been good entertainment for an observer as I struggled to get it draped as it is intended to be. When I eventually got it on I had a good laugh at my tracks on the beach. It looked as if I'd had a moment of madness dancing and pirouetting around in the midst of a sober and solitary trail up to and on from that mad dance. I enjoyed the walk along the beach.

Somehow the wind and the drizzle matched the wildness of the waves, the windswept beach with its jetsam of bull kelp and the pacific gulls and oyster catchers along the shore. As the wind wasn't all that strong and was mostly from a northerly direction the crossing was uneventful and uncomplicated. I was impressed by how many wombat and wallaby tracks there were along the banks of the lagoon.

The boat at New River Lagoon - it is heavier than it looks!

Day Seven 25 June

The morning forecast was for increasing showers and rain for the next four days but while there were some heavy showers, most of the early rain was drizzle really so I packed up and headed for Surprise Bay. I got pretty wet on the walk to Surprise Bay as the showers certainly got heavier so I decided to camp there after a short day to wait out the worst of the rain. It was a nice walk though. The crossing of Milford Creek was a thigh-deep wade and it looked like it was rising.

By the time I got to Surprise Bay the creek at the west end of the beach was running pretty strongly and was turbulent with froth and dark with tannin so that I had no idea how deep it was. It turned out to be above waist deep with a strong current but I managed to keep my feet. The campsite above the beach was quite large with a good selection of sites to pitch a tent so I set up my tent and tarp and added my poncho/tarp to the set-up which allowed me quite a bit of dry space to sit under outside of my tent.

New River Lagoon from the air

Leeches!

I came across my first leech here. I can't say I'd missed them earlier in the walk as I'm not too fond of the little suckers but I'd been surprised by their relative absence and had puzzled over why this might have been the case. I can only think that the salty air and seaside environment was something that they weren't fond of. I always carry salt to deal with them and know how much they dislike it.

For this trip I was keen to try some pyrethrin spray that my research indicated should be effective with leeches. So the first leech was experiment number one and it was one leech down. Even here there were not many leeches and because of that I suppose I got careless. After retiring to my sleeping bag after dark something bothered me while I was lying there reflecting on the day. On turning on my led lantern I discovered a leech stretching from the inside of the inner tent towards my cheek, only a few centimetres away. A flurry of activity and some more spray and scratch leech number two. That had me checking the inside of my tent pretty carefully to make sure that there were no more to surprise me inside the tent and that the inner was zipped up fully.

When it gets dark at 5pm and doesn't get light again until 7.30am I tend to spend a lot of time in my sleeping bag and really too much time trying to get some sleep. Winter walking is a way of catching up on sleep and I wouldn't recommend it for insomniacs. At night I value the mp3 player and little radio, even when the reception is pretty crappy.

Related Posts

The South Coast Track - Solo Winter Trip report by Larry Hamilton - Part One
Larry's Port Davey Trip Report- great reading
Gear List for Wilderness Bushwalking Trip - Larry Hamilton's excellent gear list
Stuck between Louisa and Faraway Creeks - Our adventure on the South Coast Track
Hiking the South Coast Track - our first (and last time)

Continue Reading ....

Overland Track - Winter hike - a photographers paradise

There are photographs of the Tasmanian Wilderness and then there are beautiful images.

Pieces of art that reflect the beauty of the area and tell a story that excites you and makes you want to be there!
Ice on duck boarding - Dave Noble

In this post, we highlight a TINY part of a fantastic photographic essay of a recent hike across the Overland Track in Tasmania by Dave Noble (and party). The walk from Cradle Mountain to Lake St Clair covers about 85km of some spectacular wilderness in the heart of Tasmania. It is usually undertaken over five nights but in this case the trip was planned for 10 days to allow for side trips and photography.

The glow of a coal stove - Kia Ora Hut - The Overland Track - Dave Noble

Frank has enormous respect for Dave Noble who has been hiking in Tasmania (and many other places) since the early 1970's. He has achieved many feats that are the envy of less adventurous bushwalkers. These include extensive multi-day hikes in the South West National Park in Tasmania in the mid 1970's and then a multitude of fantastic trips in various places across Australia.

Close up with reflection - Overland Track - Dave Noble

We encourage you to visit Dave's site and read the full trip report and check out the terrific images of this winter hike: The Reserve in Winter - A Walk Along Tasmania's Overland Track - July 2009

Related Posts:

Overland Track - Winter in Tasmania - some lessons
The Overland Track eBook - information post
Overland Track eBook reviews
The Overland Track solo - Sue's trip report

Additional Information
Overland Track 2008 - Great trip report by Matthias
Bushwalk Tasmania - the resource for Tasmanian Bushwalking

All photographs are used with the kind permission of Dave Noble

Continue Reading ....

South Coast Track - Tasmania - Solo winter trip report

Solo hiking in the Tasmanian Wilderness World Heritage area?
A fantastic mix of coastal and inland hiking over 85km (53 miles)
Wild oceans with the next land mass south the Antarctica?
Challenging bushwalking with harsh weather conditions, no huts, minimal infrastructure that requires experience and thorough planning?

If all (or some) of the above get you itching for a great adventure then read on.....

In this guest post, Larry Hamilton returns with a wonderful trip report following his recent completion of the South Coast Track in Tasmania's far south west.

View South Coast Track in a larger map

The following is Part One of Larry's South Coast Track trip report from Melaleuca to Louisa River.

Intentions
This walk was originally intended to be combined with the Port Davey Track and completed in 2008. Unfortunately last year I struck some unusually bad weather and took longer to do the Port Davey track than planned because I had to wait out bad weather and high stream levels. When I got to Melaleuca my resupply food wasn't waiting for me and took another three days to arrive. Prudence led me to cut my losses and fly out from Melaleuca rather than continue with no buffer of spare days for bad weather or high rivers. So the South Coast Track and the completion of my planned walk waited until this year when I managed to find another period of leave to do it.

My goal for this year was to do the South Coast Track in winter, allowing for sufficient food, fuel and time to accommodate the vagaries of the weather and flood levels. Accordingly I kept a period of three weeks available to undertake the walk had had my fingers crossed that the weather would not delay a Par Avion flight into Melaleuca longer than a week. I therefore planned to have available sufficient time, fuel and food for 14 days on the track, hoping of course to be able to complete it in shorter time.

In winter you don’t get long daylight hours and you have to be prepared to wait. I started the South Coast Track on 19 June when it doesn’t really get light enough to walk until 8 am and it is almost dark again at 5pm. I ended up going over the Ironbounds on the day after the winter solstice and took 8.5 hours but I started before dawn and walked into Little Deadman Bay in the dusk. Short daylight hours are I think the biggest limitation in winter walking, much more so than is the weather.

I'd planned to be very flexible with my itinerary and looked forward to taking some side trips. I particularly wanted to get into Louisa Bay as I'd read that this is a pretty spot. As it happened though, the good weather enticed me to get past the problem rivers while the water was low so in the end I didn't take any side trips and instead took rest days and poked around the main campsites along the track.

Trip Report
The weather was kind to me approaching the date of my leave and my booking with Par Avion for an 18 June fly out wasn't delayed. I flew into Melaleuca with five tourists doing a visit to Melaleuca combined with a trip out on Bathurst Harbour with the Par Avion pilot. I decided to go out onto Bathurst Harbour with them, stay at Melaleuca for the night and begin the South Coast Track the following day.

Day One 19 June
Towards Point Eric

Despite having some overnight rain the day dawned clear and cold and I had a beautiful day walking in to Freney Lagoon. I was at the beach early and had lunch at Point Eric. Because of the time I decided to push on to Buoy Creek, arrived there early in the afternoon and whiled away the afternoon sitting in the sun, eating scroggin and drinking cups of tea. I had knee deep water in rounding Black Cliff even though it was just past low tide but that was the only tricky spot for the day. An easy and enjoyable day!

Looking back towards Point Eric

Day Two 20 June
Another clear and cold day with lots of dew. It was quite muddy going up alongside Buoy Creek across the buttongrass plain and I slipped and fell a couple of times. In one fall the branches of a bush flicked my glasses off and despite some earnest efforts and about half an hour looking I couldn't find them. It didn't help that the frames were a similar colour to the buttongrass stems and that I my acuity wasn't flash without my glasses so I ended up giving up without finding them. I always carry a spare pair of reading glasses but would have to manage without glasses for distance work for the rest of the trip. I've got quite severe astigmatism and while I can cope without glasses, my capacity to deal with detail is significantly reduced. I found it interesting that I coped well without glasses when the light was good but in dim light I found myself peering myopically at the track. So at each end of the day and under heavy tree cover particularly when it was cloudy, I suffered a bit.

Buoy Creek campsite

The Red Point Hills were the first ascent of the trip. Foolishly I tried to take these quickly and ended up suffering as a result. My preparation for the trip was interfered with by a busy work schedule and too much work travel which cut into my training. When I started panting on the way up Red Point Hills I worried a bit as the 200 metre ascent was tiny compared to what was ahead. My concern was unnecessary as it turned out as I quickly got my second wind and got into a groove with climbing at a more sensible pace. The view from the top and the desire to linger and enjoy it helped as well.

Looking back towards Buoy Creek from Red Point Hills

The day was a significant one as three potential delay points (Faraway Creek, Louisa Creek and Louisa River) were passed without incident as the water was low and the crossings trouble-free. I was both surprised and impressed by the extensive boardwalk that had been installed over the wet buttongrass plain approaching Louisa River. Along the way there were many packs of boards that had been airlifted in and were awaiting a construction effort. It would have been a very muddy and damp section without the work already done and the upgrading of the track is going to be pretty extensive.

I found this a fairly tiring day, probably because it was the second day of the walk which I always find the toughest and the first day with vertical ascents and mud. Because of this I was pleased to get into the campsite at Louisa River. During the day the wind had picked up and some gusts were quite strong. I kept eying off the dead branches of the forest trees I was camping under and was careful to pick a site that was not just level and dry but without branches likely to come off in a high wind.

Louisa River Crossing

Just on dusk I surprised a young Eastern Quoll determined to investigate my tent. I had to work hard to discourage his interest. Because of his determination to check out my food supplies, I was a bit anxious about him returning and damaging my gear in his enthusiasm to get at my scroggin supplies. Despite my worries and some careful listening in the dark I don't think he returned. Maybe my snoring scared him off.

Day Three 21 June
I decided to have a relaxing day poking around Louisa River, partly because the forecast was for strong winds and some rain but also so that I would be rested for the anticipated long day over the Ironbounds. John Chapman had provided me with the locations of the interim campsites on the Ironbounds so I was prepared to make the trip over the Ironbounds a two-day trip but for obvious reasons I wanted to do it in one day. As a result I had a rest day on the winter solstice and used my little radio to listen in to the broadcast football matches.

Related Posts
Larry's Port Davey Trip Report- great reading
Gear List for Wilderness Bushwalking Trip - Larry Hamilton's excellent gear list
Stuck between Louisa and Faraway Creeks - Our adventure on the South Coast Track
Hiking the South Coast Track - our first (and last time)

Continue Reading ....

Bibbulmun Track - Planning

The Bibbulmun Track is one of the world's great long distance walk trails, stretching nearly 1000kms from Kalamunda, a suburb in the hills on the outskirts of Perth, to the historic town of Albany on the south coast of Australia.

In this post, our "End to Ender" Dave Tomlinson, shares his experience on planning, equipment, food, shelter, clothing, cooking and navigation.

There is some great information in this post to assist anyone planning all or part of the Bibbulman Track - something we would love to undertake in the future.

Shelter
The Bibbulmun Track has wooden shelters generally spaced between 13km and 24km apart. The average distance would be about 18km, although in the Kalamunda National Park they are only about 10km apart. I recommend passing through every second one in that section.

Inside the Waalegh shelter - great facilities

At the time of year I completed the track I had 80% of the campsites totally to myself. So there was no need to carry a tent and I appreciated not having the extra weight. I could assure anyone walking in summer that you'd always find accommodation in the shelters. However, the most popular period for hiking is in spring time when the wildflowers are out. Based on what I read in some of the logbooks, I couldn't give the same assurance during this season.
The Waalegh shelter - water tank and fireplace

The facilities of the track are world class and very well maintained. I often thought of the wooden shelters as large 'bus stops', with three sides that always offered protection from the prevailing winds. There was a difference between the shelters in the northern half and those in the south. Those in the north had a picnic table in the middle and hardboard bunks on either side. In the south the sleeping platform extended around two walls in a large L shape with the picnic table in the remaining space. Both would be able to sleep a maximum of 16 people.

The campsites were generally in a very pleasant location and well landscaped. Apart from the shelter and picnic table, there was a pit toilet that often had toilet paper. There was a large rainwater tank beside the shelter and this is checked by park staff through the dry season to ensure there is always an adequate supply. There was always a fireplace that can usually be used for cooking but I respected the summer fire ban and used my camp stove instead. Most sites also had a second picnic table outside the shelter.

The one campsite which was different from the others was Mount Wells. This was fully enclosed hut because it's in an exposed and often windy location. You feel a bit like Scott in the Antarctic staying there but as the wind whistles around outside you appreciate having the four walls and it's a nice view when you awake in the morning.

Stove
My camp stove is a simple arrangement that folds up into a small pouch. It uses the butane gas canisters that have a threaded attachment to the stove. I found, on average, that one standard size canister would last about a week and they were easily found at every town along the track. There was one occasion when I ran out of gas and had to (very carefully) break the fire ban to cook.
The offending fireplace...
Clothing
Again, this depends largely on the time of year. I walked during February and March which is the warmest time of the year in Western Australia. So, I usually only needed t-shirt and shorts when I was hiking during the day. Sometimes I'd use a light windbreaker along the southern coast but it was never cold. It was sometimes cool in the evenings so I put on a sweater and long pants. Altogether, I only had about four days of rain in seven weeks but appreciated having my Goretex jacket when it did.

One of the most important recommendations I could make about clothing relates to your feet. They are what will carry you each day and you must look after them. Firstly, ensure your boots are well broken in and comfortable. Secondly, wear two pairs of socks and always carry at least one other pair. Wearing a thin pair of socks under your hiking socks will help prevent blisters. Also, ensure that your toenails are always cut short, especially in sections that involve hills.

Sleeping Bag
My sleeping bag is rated 5ºC and this was adequate…just! There were some nights, especially in the southern section, where I needed my warm clothing inside my bag at night. Obviously, the rating of your sleeping bag will depend on the season you are walking but I'd make a simple recommendation: go 5ºC below what you think you'll require. A bag with a hood is best, especially in the colder conditions.

Other equipment
Apart from my clothing, sleeping bag and cooking equipment, there were a number of other important items that should be taken. If you are hiking in summer then ensure you have good supplies of sun cream and insect repellent. A basic kit and first aid knowledge are essential, especially if you are hiking alone. Know what to do if you get a snake bite.

I had a headlight and very small torch as a back up. If you enjoy the camp logbooks as I did, there is usually plenty of reading at each site but I recommend taking a book and also a journal. In such tranquility, I enjoyed writing about my thoughts and experiences each day. I also recommend taking an MP3 player. Listening to some music for half an hour is always a pleasant way to end the day. The one thing that I wish I hadn't taken is my deodorant. I meant well but really…who needs it out there?

A couple of things I did find very useful were an inflatable pillow and a net you can wear on your head to keep flies and mosquitoes away. I didn't need the latter too often but really I valued it sometimes. I found my pair of gaiters to be useful in the southern sections that involved walking though sand dunes. Never forget your sunhat, especially in summer and I recommend carrying a beanie at any time of the year.

Food
Food, glorious food. In planning any hiking trip, this is undoubtedly one of the first considerations. Between Kalamunda and Albany, the Bibbulmun Track goes through a total of seven towns, past a roadhouse and a camping ground. So, you always need to be supplied for between three and ten days along the way.
Mushrooms along the Track - don't think this one is edible


The longest leg is the first from Kalamunda to Dwellingup. This is ten days, although you do reach the roadhouse at North Bannister after a week. Apart from a good takeaway meal, an ice cream and some snack food, don't count on being able to re-supply here. The other option is to hide a food drop here for the three days through to Dwellingup.

Each of the other towns has either a general store or even small supermarket where you can get the food you require and also a new canister of cooking gas. If you need to buy any new clothing items (I wore out a pair of socks), Collie, Pemberton, Walpole and Denmark all have a reasonable range. I also recommend the bakeries in these towns, although the one in Collie does close early on some days.

There is also a small store in the settlement of Donnelly River that stocks some hiking food. There isn't a great variety but you'll certainly find enough to get you through to Pemberton. Peaceful Bay has a general store at the caravan park which was well stocked when I was there. However, this is a seasonal place and wouldn't have the same choice at other times of the year. I suggest checking in Walpole if you're unsure.
Youth Hostel at Walpole - Dave was very impressed with all the "locals" he met along the Track

Personally, I like to carry at least a small quantity of fresh food. This was usually in the form of a cucumber and a few apples, tomatoes and carrots. I recommend carrying fresh food, cheese and salami in a small cooler bag, especially in warmer weather. This will help it stay fresh and protect it from getting squashed in your pack.

Ensure that you have a large plastic bottle (at least 1.5 litre) with you. This will carry your water while you're hiking but I also used it to have a bath at each campsite. Remember that water is heavy so don't carry more than you need to each day. Consider the weather conditions, distance and whether you will be passing a campsite along the way. I usually arrived at my destination camp each day with about 100ml of water. This small amount was kept in case anything unforeseen happened.

Camera
As with all of my trips, I had my digital camera with me. Although it's a little more bulky than most, it does have 6x optical zoom. Compared to the 3x zoom of many cameras, this is often very handy. To conserve batteries, I removed them from the camera each night and replaced them again in the morning. I was able to recharge them at each place I stayed at along the way. Always carry a spare set though because there is nothing more frustrating than not being able to capture that beautiful scene because of dead camera batteries!

I always carry my camera on the front supporting strap of my pack. That way it's always easily accessible without having to stop. I always ensure it's kept dry and away from sand and dust as much as possible. It's a good idea to have a second data card and always ensure you have enough space on it for the photos that you're likely to take.

Navigation
There is no need for a detailed topographical map or GPS unit. The track is very well marked along its entire length and any navigational errors were simply due to my own inattention at vital moments. Keep watching for those yellow triangle track markers! It's not essential, but I recommend a small guide book or at least some notes from the internet as a reference for the terrain and any particular things of interest along the way.


Related Posts:
Bibbulmun Track - Part One - A very long hike
Bibbulmun Track - Part Two - The Southern Section

The Official Site:
Bibbulmun Track - Trip Planning

Many thanks to Dave Tomlinson for his fantastic words and pictures for this post.

Don't forget to check out his other posts on the Great South West Walk, another long distance hike on the other side of Australia.

GSWW - Section 1 - The Cobboboonee Forest

Continue Reading ....

Cradle Mountain adventure - a short story

Adventure around Cradle Mountain?
Fact or fiction?
A day hike around Cradle Mountain with a twist (or two)?

Then this story is for you!

Frank stumbled across a very enjoyable blog today titled American in Oz. He reads a lot of blog posts about Tasmania and especially the Cradle Mountain area in Australia's most southern state, Tasmania. These post are a great source of inspiration and fun when he is stuck in his "real life".

This post , Tracks Less Travelled, a Tasmanian short story , really got his attention and the beautiful word craft and surprises in the story had him captivated.

Another fantastic image by Tasadam, Definitive Cradle Mountain - This picture is from a set titled The Overland Track - Tasmania - well worth a look at all his great photographs.

The following are some exerts from the story by annielaural:

" At the same time that she was fearful of stepping off the planked trail, she wished she had the courage to head off cross-country, to snake up the face of Marian’s Lookout, to beat Chris to the top. The competition between them never failed to engage her "

" Nueva’s was far more moderate in grade, longer with twelve hundred year old King Billy and Pencil Pines growing close to the water. Pandani towered over her head in the protection of the Ballroom Forest and Cutting Grass and Sassafras, growing far too close to the track, waited to wound. Daydreaming here was out of the question."

" It was still early afternoon. She had three more hours of daylight. A night in the dark on the trail was not appealing. She had plenty of clothes if she kept moving, but she didn’t have enough cold weather gear to spend the night out here, especially if it rained, and it was bound to rain as the temperatures cooled down "


To read the whole story (and it is a lot different to what you would normally read here), go to the full post on "American in Oz" , Tracks Less Travelled - a Tasmanian short story

We hope you enjoy it.

Related Posts:
The Overland Track - Planning the walk from Overseas
Hiking the Overland Track - a view from the States
Cradle Mountain local walk and Cradle Mountain Lodge

Continue Reading ....

Overland Track - Tasmania in Winter - some lessons

The Overland Track in Tasmania is a fantastic 6 days hiking experience. It is isolated, can throw up tough conditions and challenge you both physically and mentally. In fact, unless you are adequately prepared for bitterly cold and mind numbing conditions in winter, you risk serious problems (and the possibility of death) No joking.

Walking the Overland Track in winter needs thorough planning, excellent gear and experience in tough Tasmanian conditions.

In this post we are shamelessly plugging our Hiking the Overland Track eBook, not as a way to make us rich, but as a good resource to help you plan your trip and reduce the risks to a managable level.

Why the plug?

We have just finished reading Aaron White's blog Aaron's Assonant Advertures In Australia and want to share some of his posts with potential Overland Track hikers. We highly recommend reading Aaron's Overland Track posts to get the full story.

We really enjoyed Aaron's writing style and story telling ability - it is great read.

This first post : Overland Track Chronicles - Rugging up sets the scene for his recent winter trip.
Sue and Frank - hiking in Tasmania - winter - can't be too bad, we are smiling!

As reasonably experienced Tasmania hikers, reading his story immediately created warning bells in our minds, so we decided to post some snippets of his experiences and make a few comments about them so others who attempt the Overland Track in winter can be better prepared.


So read on, snippets from Aarons posts about a "hearty native Minnesotan" hiking the Overland Track in early winter. (with our comments below):

Buying Gear:
Without hesitation, he led me to a corner that was a forest of hangers with only rainjackets. "It rains a lot in Tasmania, so you'll need a good shell layer. This jacket here is 100% rain and wind proof. Feel it. Real gortex."
Mmmm gortex. I felt the smooth, yet rubbery sleeve and subtley turned the affixed price tag to my direction. $800.
"So will this keep me warm as well?" I asked.
"Oh no, sir!" The definity of his answer jabbed a hole right through what was left of my not-ignorant face. "This is just a shell layer. You'll need a good fleece jacket, coat, and of course (chuckle) thermals. I mean you at least have thermals right?"

Read this post: Best Hiking Clothes for a multiday hike in Tasmania - the layering principal

I found a cheap rain jacket for sale at a random Sydney shop for $40. In Launceston, I bought my stove, fleece coat, fleece gloves, tent and some wool socks at the local K-mart. I wasn't a Super Backpacker Man, but I think I was alright.

In the Overland Track eBook we go into detail about gear selection, what you need to take and what is not required.

Planning:
That night though, I didn't sleep, not even for a minute. I tossed, turned and froze to death under my pile of blankets in the heated Tasmanian room. Launceston isn't even in the mountains. I already knew my light summer sleeping bag would not be enough, even when fully clothed. I thought of my gear, my garbage bag gaiters, my lack of sleeping mat. Why did I buy potatoes?

I rolled out of bed at 5:59, yelling at my 6:00 alarm to wake up. I saw that it was the morning of May 13th (duhn duhn duh!!!!). I repacked my bag, cut back on some of the food, tossed out my potatoes. I removed the one pair of comfort clothing I saved for my first night off the mountain and cut back on a few other odds and ends. The bag was still too heavy, but it was at least manageable.

Read this post: Hiking gear what are the basics to get started

I still wasn't content. I threw on my hiking boots and headed to the 24hour Kmart for a camping mat. Freezing to death from no ground insulation was not the way I wanted to kick it. I walked a half block before I hit another obstacle to my coming hike: my ankles were in intense pain.

Three hours later, I arrived and Cradle Mountain National Park, ready to go, pain or not. I caved in a bought some actual rain pants at the inflated middle-of-nowhere price of $60

Many hikers leave on a sunny day, unprepared, without raingear or warm clothing and die when trapped in a snowstorm. I was undertaking it in mid-May, when you don't have to pay the $150 fee, but have to deal with less desirable weather and very short days.

Hiking during the non fee paying season is Ok if you are experienced and prepared. There is minimal support from Tasmanian Parks and Wildlife Service and less people around to help get you out of trouble.
Sue, heading off into the Walls of Jerusalum in December (the first month of the Australian summer)

The Overland Track:

"Continue on? Isn't this the hut?"
Kitchen Hut in better weather - May 08- note the second level door and shovel for access during heavy snow and also leon in jean shorts - they got wet the first 10 minutes and stayed wet for the rest of the trip (wrapped up in the bottom of his pack)

"Oh no, this is just Kitchen Hut, an emergency shelter. The first overnight hut is another two hours further on."
That put me at just more than halfway done with the day. I was already exhausted: my back hurt, my ankles hurt, and one layer of face had been not so carefully removed by unhindered, blowing precipitation. There was thankfully only 30 minutes left on the open mountain face.

I collapsed upon opening the door. I just wasn't in enough shape for this first day of climbing, but a good nights sleep would hopefully give me the strength for the next. The hut was quite nice, with wooden bunks to sleep 25 and a gas heater to dry off all of our gear.

Even with a rain jacket, rain pants, fleece coat, hooded sweatshirt, t-shirt, and jeans, I was soaked all the way down to my thermals. I had a backpack cover over my water resistant backpack, but this proved useless: everything in my pack was wet. That day, even the super backpackers, with their $1000 dollar backpacks and special waterproof covers learned the lesson that "waterproof" is a myth.

Read this post by Matthias at Matt Worldwide: Preparing for a 10 day hike in South West Tasmania

Do not take cotton clothes such as jeans or track pants, once wet they will NOT DRY .

The second morning - leaving Waterfall Valley Hut
I jumped out of the creek, gave it the finger, and stomped through the pouring rain back to the hut and threw my fifty pound pack in the corner.

"I'm done! It's cold, rainy, everything is wet, it's too f**king foggy to see anything, and there is a f**king knee deep creek right at the start of this horrible day. Now, I'm going to have to walk with wet feet for the next 25km. I paid $1000 to do this piece of s#$t walk and it has been nothing but one... big...f**king...disappointment. I'm not putting up with this. I'm going back. That's it. F%$k this s*&t!"

The others at the hut were not really expecting such a tirade, especially minutes into the second day of the hike. Everyone, just kept on eating the breakfast in uncomfortable silence, until a young German woman finally asked the one question on everyones' mind. "Is there any way around this knee deep creek?"

"No!"
Five minutes later, I had my socks wrung out, I had my clothes put back on and was ready to move on.

Arriving Windemere Hut
I removed my completely wet gear and went into my backpack for my dry change of clothing. Even after repacking everything in garbage bags, my clothes were still damp. The left me with no dry clothes and the temperature was quickly dropping.

Within minutes, I was shivering uncontrollably and started feeling a bit faint. I could tell I was showing the early symptoms of hypothermia. I threw on my fleece coat even though it was wet. That is one thing I love about polar fleece, it is the amazing fabric that maintains warmth, even when wet.

Lightweight plastic garbage bags are not waterproof - they perforate easily and you gear will get wet. You need to double bag critical gear inside a pack liner (pack covers will not keep your pack contents dry!)

The previous night, Brian (a guy Aaron met on the Track) had slept in a tent in the rain, instead of the hut. Everything he owned, including sleeping back was soaked. His body was not forgiving him for the prior two days' punishment. He was cramping, worn-down, cold. Instead of pushing on that day, he decided to rest another day. This was an option I chose to wave, despite the inconceivably worse weather that day.

Since I was not going forward, I wanted to head back and see all the various side trails along the way I had passed up. - At this point Aaron decided to return to the Cradle Mountain end of the walk and not risk worse weather conditions that were forecast - a wise move.

I awoke in the middle of the night with the startling discovery that the Socks Paradox was in fact a myth. Once I donned my fifth pair of socks, wrapped my feet in a sweater, put the bottom of my sleeping bag in a canvas shopping bag, I was able to make my feet merely cold. It was a long, blustery night. The wind tested the structural integrity of the cabin.

I wasn't the only person who had a cold night. A young British bloke spent the night with merely a blanket. His one pair of socks was soaked from the previous day's walk. The sneakers he brought were still wet and he had no rain coat. The temperature was below freezing that day. Despite this, he pushed on. This is how people die.

The End- back at the Cradle Mountain Area
I was in my element, until I reached the top of the mountain.
Suddenly, I found myself in North Dakota mid-blizzard or maybe on top of mountain mid-blizzard, same difference. I pushed forward through knee-deep snow, which was good, because it stabilized me from being toppled by the wind. I was glad it was only a couple of miles back to Kitchen Hut.

Inside the Kitchen Hut, I found an Aussie family from Brisbane, with a twelve year old child. They started the previous day, but got trapped from the excessive winds. I was actually quite glad to see them safe and alive; other hikers the previous night had told me of this family.
They decided to head back to the park with me, so we headed out into the blizzard. At first it wasn't too bad, but after fifteen meters, the wind came back with a vengeance, the strongest I've faced on the trail. Being from Queensland, the boy had never seen snow before, now he was stuck in Antartica. They wisely turned back.

Many thanks to Aaron White for his great insights and honest appraisal of his Overland Track experience. Remember, you can read Aaron's eight posts on his blog, Aaron's Assonant Adventures in Australia.


Related Posts
The Overland Track eBook - information post
Overland Track eBook reviews
The Overland Track solo - Sue's trip report

Additional Information
Overland Track 2008 - Great trip report by Matthias
Bushwalk Tasmania - the resource for Tasmanian Bushwalking

Continue Reading ....

Tasmanian Winter Images - Introducing Tasadam

Tasmania, Australia, is a photographers dream.

Wilderness, huge vistas, interesting elements and unspoilt scenery.

Taking a good picture is not hard but getting a fantastic photograph takes talent, time, effort and perseverance.

In this post, we invited Tasadam to share some of his spectacular wilderness photographs that focus on winter in Tasmania. Winter has just arrived in Australia and these shots are part of Tasadam's beautiful portfolio . In the future, as the seasons change, more of Tasadam's work will be featured here.

Water in Three Forms

About the Artist

My name is Adam and I live in Tasmania, Australia, so I call myself Tasadam.

I have been taking photographs for many years. I started when I was young – I don’t really remember when. I do remember when I was 11 years old, I went on a school camp for 6 days and had a 110 Instamatic film camera. My spending money went on film, and I remember my parents weren’t too impressed when I returned home with all those photographs that needed developing…

I studied Photography as an extra subject at Technical College in 1981 where I first picked up an SLR camera. By this time I had developed an eye for subject and composition detail. The honing of my current skills along with the training in technique I received was excellent and opened me towards a new level.


Winter Cradle Plateau

Not long after, I had a few SLR cameras and various lenses of my own and my style and skills flourished.

Beyond film, I introduced myself into the digital photography era and have subsequently upgraded my equipment several times.

I have taken modelling and portraiture photography in the past along with weddings, and though I find them enjoyable (although stressful), I prefer to do my photography in conjunction with another passion – bushwalking.

When my wife and I go bushwalking in Tasmania, we typically carry around 10 kilograms of camera gear – two bodies, two tripods, five lenses, and various accessories – batteries, memory cards, cleaning apparatus and the like.


Winter Summit Mt Ossa

I prefer to portray images as I saw them, rather than overdo the post processing with HDR and over-saturation etc. It takes time to process, adjust levels and sharpness to create the best image possible.

I trust you enjoy the results of my efforts.

Check out Tasadam's art here and enjoy more of his wonderful Tasmanian photographs. You can access his full winter gallery "Cold Tasmania" here.

Related Posts
Outdoor Photography - Six great links to help make your pictures brilliant
The Overland Track - Track Images

Continue Reading ....

Win a free trip to Tasmania and hike the Overland Track

Hike the Overland Track free?
Win a trip to Australia and a free trip on the Overland Track with Cradle Mountain Huts?

We stumbled across this opportunity today for anyone who owns a pair of Blundstone Boots (an Aussie icon in work footwear)

Towards Barn Bluff - Overland Track- Tasmania

Head off to the Blundstone Canada  web site and check out the competition they are running to win a FREE trip from Canada to Tasmania. Included is a guided walk across the Overland Track with Cradle Huts. (worth around $A2500)

This is the blurb off the website:

The Cradle Mountain Huts Walk an all inclusive experience for two people 5 nights - 6 days

The Cradle Mountain Huts six-day walk follows the iconic Overland Track through Tasmania's World Heritage Area. This 40 mile journey offers a rare privilege - one of the world's great walks through an ancient and richly varied landscape is normally accessible only to the hardy - for at the end of each day hikers sleep in private, environmentally-sensitive cabins. 

There are hot showers. 
Food and wine can feature almost as much as the mountains, rainforests and indigenous wildlife. The huts have been designed to complement their sensitive surroundings. Each hut contains twin share accommodation, toilets, heating, full kitchen facilities and a living/dining area. The guides on this unhurried journey share their knowledge of the landscape, the flora and the fauna, to ensure a rich and informative journey.

The competition runs until the 30th June, so get in quick.


We love our Blundstone boots and had a pair each for years. They are are great Aussie icon...

Related Posts:

Hiking the Overland Track e-Book

Release of the Overland Track book

Various Overland Track posts

Continue Reading ....

Outdoor Station Podcasts - Great listening

Frank does a lot of commuting by train and car each week. The ONLY advantage of this is the time it allows to listen to some great podcasts on a huge range of interesting topics.

One of his favourites is The Outdoor Station from the UK. They have some great topics related to the "Outdoors" - duh! hence the name....

Topics covered range from gear reviews, trip reports, interviews and as they say, much much more!

We highly recommend you drop by and subscribe to the audio and video podcasts, Professionally produced, they are very relaxed, informative and present some great information.

Click on the sample below, "Get out there" to down load or you can listen directly from here. This podcast, as described by Outdoor Station is:

A rich and varied podcast for you this time, as I catch up with the Ramblers Association to hear how there’s a new influx of members in these credit crunched times, Andy continues his love affair with everything French by finding out how inexpensive it is to travel on the canals of mainland Europe, plus I discover how, if you can’t get to the Desert, you can bring the Desert home to you with Harem Nights! Recorded at the NEC early 2009


Get Out There!


Download
MP3 File


Do you have any favourite outdoor podcasts you can recommend? We would love to hear your suggestions and fill the iPod with some great stories about the outdoors.

Continue Reading ....